For beginner drivers, setting up the car is a MUST for control, communication, and comfort.
OVERVIEW1) Put the KEY in the ignition, so as NOT to lose it; 2) Adjust the seat - the back and the front so that you're comfortable and have control of the vehicle; 3) Fasten your SEATBELT correctly & adjust - both the shoulder and lap strap; 4) Adjust the MIRRORS - set up the centre and wing mirror so that you can see and observe correctly during your drive; 5) Ensure there's nothing on the DASH, nothing on the ledge on the back window if you're driving a car that could fall off during the drive and distract you; 6) Adjust the VENTS for good ventalation and defrosting; 7) Check the BRAKE to ensure that it works and your vehicle will stop; 8) Last, LOCK the doors. Most modern vehicle will do this automatically however. |
 For beginners, when learning how to drive a car, proper set up of the vehicle's control to have the best learning experience possible.CLOSED CAPTION
Hi there smart drivers, Rick with Smart Drive Test talking today about how to setup the vehicle.
This video is for brand new drivers who are just getting started learning how to drive.
It's important to set up the vehicle and have it set up correctly.
That way you have total control of the vehicle and you're comfortable.
These techniques will work for any vehicle and that's a great thing about them - just follow the steps and if you're moving around between vehicles it'll help you out to get the vehicle setup.
| Don't Fail Your Road Test!! | |
A course for new drivers working towards their first license. This self-paced course gives you:
|
GUARANTEED TO PASS FIRST TIME OR WE'LL REFUND YOUR MONEY
Introduction
8 Steps to Set Up Vehicle
1) put the key in the ignition, and I know that in some U.S.
states they don't want you to put the key in the ignition until you're actually ready to drive, but for the purposes of not losing the key put it in the ignition.
2) the next piece is the seat.
Set up the seat, the back and the front so that you're comfortable and have total control of the vehicle.
3) the seatbelt;
4) the mirrors - set up the mirror so that you can see and observe correctly during your drive.
5) nothing on the dash, nothing on the ledge on the back window if you're driving a car.
 These steps to set up the vehicle's controls will work for any and ALL vehicles.6) setting up the vents;
7) checking the brake, and making sure that the brake works properly.
If the brake doesn't work properly, you have to take the vehicle to a mechanic and get it checked.
8) and the last piece...lock the doors.
Those are the 8 steps for setting up the vehicle.
We'll be right back to give you a greater detail about those 8 steps.
Key - Know Where it is
Hi there smart drivers, welcome back.
Rick with Smart Drive Test talking to you today about how to set up the vehicle for your first driving lesson.
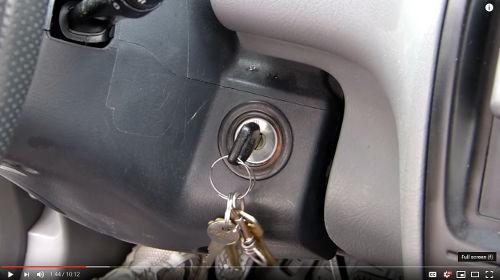 The first step to setting up the vehicle is to put the key in the ignition so it's not misplaced - something that always done, even by experienced drivers. If you have a key FOB, put it in the same place in the car every time.The first thing you do when you get in the vehicle.
Take the key and put the key in the ignition.
That way the key is not going to get lost and you know where it is.
Seat - Adjust Correctly
Second piece is to set up the seat so that you are comfortable and have total control of the vehicle while you're driving.
So to set up the seat, sit square in the seat - forward like this.
Put your foot underneath the brake pedal on the floor.
There should be a nice, slight bend in your leg, in the way that you can see here on my leg because I have the seat adjusted for myself.
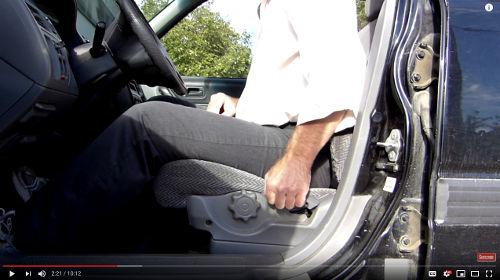 The second step in setting up the vehicle is to adjust the seat. You need to adjust both the bottom of the seat and the seat back for control and comfort.The back of the seat on all vehicles goes backwards and forwards.
And there's a lever down on the side of the seat to adjust the back forward and backwards.
You put your hand on the top of the steering wheel, there should be just a slight bend in your arm.
And the reason for that is that you have total control of the vehicle when you've got two hands on the steering wheel.
As well, the head restraint should be at the base of your skull so that way if you're unfortunate enough to be rear-ended, your head comes back and is protected against whiplash.
It is not a headrest, it is a head restraint.
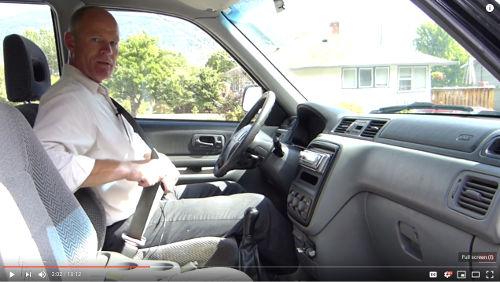
Seatbelt - Fasten & Adjust for Comfort & Control
The seatbelt - pull the seat belt out.
What I do is pull the seat belt, and I grab it down here; I slide this up to get more slack in the seatbelt, pull it across, fasten the seatbelt, and pull this snug.
And this hand, I use to make sure that the seatbelt is flat and make sure that this is flat and across your shoulder.
And this piece down here is on your hips.
If you're a woman and pregnant, make sure that it is below your belly and on your hips.
Do not have it across your belly because that is dangerous in the event of a collision and will harm your baby.
 The lap part of the seatbelt must be placed over the hips to both protect you in the event of a crash and keep you in the seat so you can control the vehicle in the event of an emergency.So ensure that you have it under your tummy and that it is down and across your hips.
So that's the seatbelt.
Some seatbelts will have an adjustment here, as this one does and you can move the seat belt up and down depending on if you're taller than I am.
That way it's more comfortable and not up on your neck and causing abrasion on your neck and irritating you.
So that's another thing that you can do here as well.
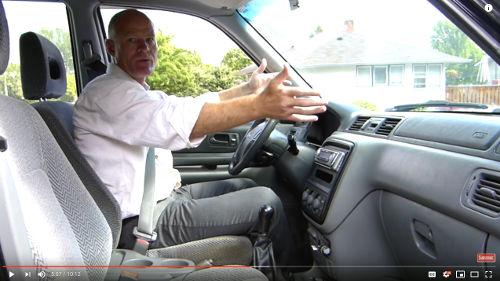
Mirrors - How to Adjust Correctly
Next part is the mirrors.
This mirror on the top here: to adjust this mirror, you should be able--in the left-hand corner of the mirror--just see a little bit of the side of your head.
And the top of the mirror should be adjusted across the top of the rear window on the back of the vehicle.
 The centre mirror is adjusted so the driver can see a tiny bit of his/her head in the left side of the mirror. The top of the mirror should be along the top of the rear window.So you adjust this so the top of the mirror is right at the back of the window at the rear.
And this side, the left side of the mirror, will just be able to see a little side of your head - just a tiny bit.
That's how you set up that mirror.
The outside mirror, you should be able to see the side of the vehicle on the inside of the mirror - just a little bit of the vehicle.
The horizon should be across the middle of the mirror.
That will set up the mirror for you on the outside.
Now it can take a little bit of adjustment to figure out where the horizon is on the middle of the mirror, but with a little bit of practice you'll be able to get that.
The horizon should be across the middle of the mirror and you should be able to see a little bit of the vehicle on the inside of the mirror.
Dash - Keep Clear for Safety
Next thing is the dash.
There shouldn't be anything on the dash:
• gloves;
• or anything like that.
Because when you go around a corner, it's going to go spinning off and you're most likely going to try and reach for it.
And when you reach for it you're going to be distracted and potentially lose control of your vehicle and not be looking where you're going.
So make sure that there's nothing on the dash.
 Do not put anything on the dash such as sunglasses, caps, or tissue packages. This distraction could cause you to lose control of the vehicle.Also, there's nothing on the rear ledge of the rear window, if you're driving a car as well.
Just keep in mind that a tissue box, for example, has the same force as a brick in the event of a high-speed collision.
So it's imperative that you keep the dash clear.
Make sure that there isn't anything on the rear window as well.
And the other thing that's dangerous in vehicles--floating around in the event of a crash--are the steering wheel locks.
Those steering wheel locks, sitting in the back there will cause an incredible amount of damage if they're flying around inside of the vehicle.
So I encourage you to put them someplace that they're going to be secure, like in the trunk or someplace else where they're not going to cause you harm in the event of a crash.
Vents - Adjust for Maximum Defrosting & Circulation
The next thing you want to setup is the four vents, so that they're not blowing on you and causing a distraction.
As well, it provides good circulation in the vehicle.
The one on the driver's side - set it up so it's approximately at the middle, but it is blowing out along the side of the vehicle.
In the wintertime, this set up of the vents will keep the side windows defrosted.
The middle ones: have one pointing down towards the floor, which will cause good circulation, and the other one up so it circulates air this way.
The one on the far side, have it pointed out and at the midpoint going out along the side of the vehicle.
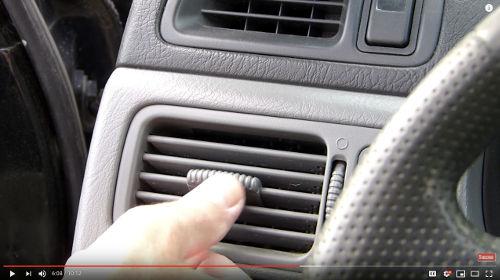 Proper adjustment of the vehicle's vents will provide good circulation of air through the cabin and keep the windows clear in cold and rainy weather.That way you'll get really good circulation in the vehicle and it helps in the winter time to defrost the windows when they need to be defrosted.
As well, in the wintertime--just another quick tip, roll the window down a crack, that way it will help to defrost the windows faster.
Brake Pedal - Be sure the brakes work
The next piece is to check the brake and you simply put your foot on the brake and the brake should maintain constant pressure.
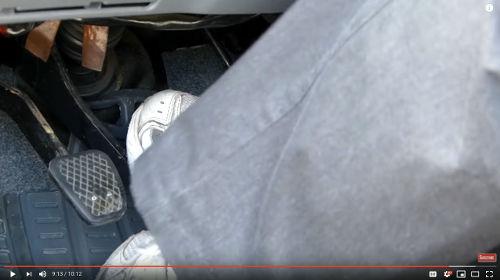 To test the brakes, push and hold the pedal. The brake pedal should stop and NOT drop. Also, you should be able to put the toe of your other foot under the brake pedal when depressed.It should not drop.
If the brake pedal drops, you should have it checked by a automotive technician because the brakes are defective.
When the brake pedal is depressed with the engine off, it should stop approximately 2" inches from the floor and hold pressure at that one place.
Lock the Doors - for Safety & Security
The last piece is to lock the doors on the vehicle.
Push that down - lock the doors.
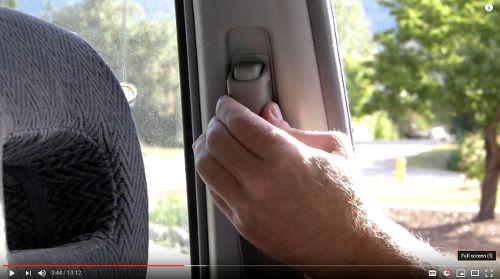 Most modern vehicles will have a height adjustment for the shoulder strap to prevent it from rubbing into your neck.The reason that you want to lock the doors is twofold:
1) the first reason is in the event of a rollover.
It will keep the doors closed and the vehicle is stronger with the doors closed.
If the doors fly open, the vehicle loses its strength and potentially could cause greater damage and harm to you and the passengers in the vehicle.
2) the next thing is it keeps thieves out.
If you have something sitting on the seat and somebody runs up in traffic and open your door and steals something off the seat.
Well if the doors are locked, they can't get in.
Many new vehicles have the feature that once the vehicle attains 20 kilometers an hour (10mph) in a forward motion it will automatically lock the doors.
But it's just a good habit to get into to lock the doors.
Get Your "How to Pass Your Driver's Test First Time"

• FEAR :: Learn the correct skills, abilities, and techniques that are required to pass your driver's test;
• SELF-CONFIDENCE :: Get the exact skills from a licensed driving instructor that will guarantee your success;
• CONFUSION :: Cut through the conflicting and incorrect information;
• QUALIFIED :: Smart Drive Test has helped 1000s to pass their drivers' test...and we can help you!
Conclusion
In conclusion, put the key in the ignition.
Set up the seat - nice bend in the legs; backwards and forwards on the base of the seat; and the back of the seat forward and backward so you have a nice slight bend in your arm when you put your hand on the top of the steering wheel.
The head restraint should hold your head in the event of a rear- end collision.
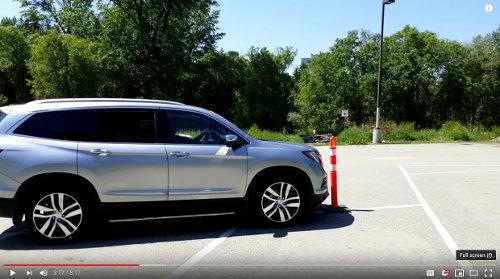
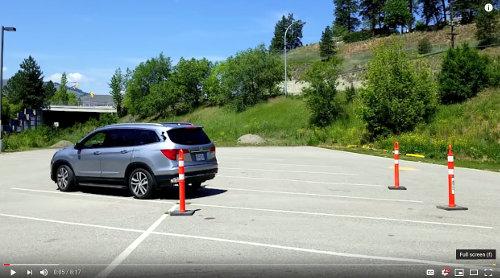 For beginner drivers, after setting up the controls work in a parking lot doing slow-speed exercises and manoeuvres. Fine tune your mirror and seat adjustments.So this bottom piece of the head restraint should be at the base of your skull.
The seatbelt: make sure it's flat and across your hips.
And on your shoulder, and there's an adjustment for people who are taller or shorter so that it's not rubbing against your neck on the shoulder strap.
Setting up the mirror: you should be able to see a little bit the side of your head in the inside of the mirror, and the top of the mirror should be in line with the top of the rear window.
The outside mirror - you should be able to see a little bit of the vehicle on the inside of the mirror and the horizon will be across the middle of the mirror.
Nothing on the dash that you have to chase in the event that you go around the corner and cause distraction, which could potentially could cause you to lose control of the vehicle and end up in a crash.
The vents - nice circulation through the vehicle.
The more circulation that you get, the less fatigued you're going to be during driving.
And in the wintertime, it will help to keep the windows defrosted.
 When adjusting the vehicle's outside mirror's you should be able to see a bit of the vehicle on the inside of the vehicle, and the horizon should be across the centre of the mirror.The last piece is to check the brake to ensure the brakes are working correctly.
You want to push down the brake pedal and it should depress slightly and then stop.
And it shouldn't go any farther.
If it continues to drop all the way to the floor, take it to a mechanic and have them check it.
Finally, you should be able to put the toe of your other foot up underneath the brake pedal when depressed.
If you can't get the toe of your other foot up underneath the brake pedal - again you should take it to a mechanic and have it check by a professional technician.
The last piece: lock the doors.
It maintains the strength of the vehicle in the event of a rollover and it keeps thieves out and keeps you in the vehicle for the purposes of safety.
I'm Rick with Smart Drive Test.
Thanks very much for watching.
If you like what you see here share, subscribe, leave a comment down in the comment section.
All of that helps us out.
Question for my smart drivers:
Do you have a tip for new drivers to help them get going and to increase their learning?
Thanks very much for watching.
Remember, pick the best answer not necessarily the right answer.
Good luck on your road test.
Have a great day.
Bye now!


 Checking")

